Acrylic Painting Singapore

Acrylic painting has gained immense popularity among artists in Singapore. Its vibrant colors, fast drying time, and versatility make it a favored medium for both beginners and experienced artists. Acrylic paints consist of pigments suspended in acrylic polymer emulsion, resulting in a water-based and quick-drying paint that can be applied to various surfaces. They’re also widely used for Art Jamming workshops in Singapore!
Whether you’re interested in creating abstract masterpieces or realistic landscapes, acrylic painting offers endless possibilities for artistic expression. In this ultimate guide, we will delve into the world of acrylic painting in Singapore and provide you with valuable insights and tips to enhance your artistic journey.
You can also check other Workshops in Singapore for more amazing creative activities!
Getting Started with Acrylic Painting
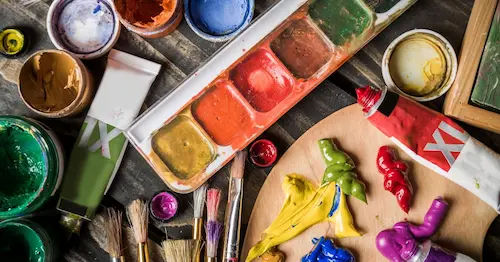
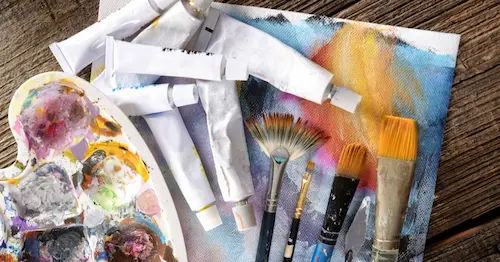
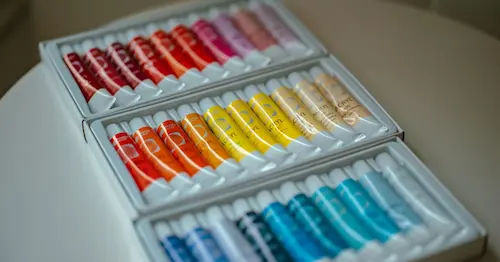
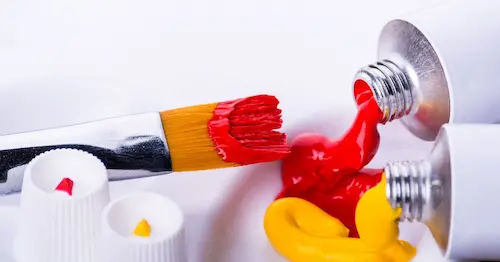
To embark on your acrylic painting journey, you’ll need a few essential materials. Begin with a set of high-quality acrylic paints that offer a wide range of colors. Look for paints that have good pigmentation and lightfastness, ensuring that your artwork retains its vibrancy over time.
Acrylic brushes come in various shapes and sizes, so consider having a selection that includes flat brushes for broad strokes, round brushes for detail work, and filbert brushes for blending. Additionally, invest in a suitable canvas or painting surface, such as stretched canvas, canvas boards, or acrylic paper. Lastly, a palette or palette paper will be necessary for mixing colors.
Exploring Techniques and Styles
1. Brushwork
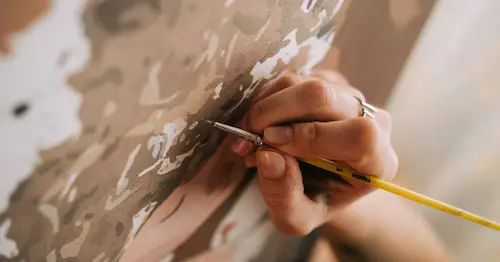
Experiment with different brushstrokes and application methods to create a range of effects in your acrylic paintings. From broad, sweeping strokes to delicate details, the type of brush and the pressure applied can significantly impact the texture and appearance of your artwork.
2. Layering
Build up layers of transparent or opaque paint to add depth and dimension to your acrylic paintings. This technique allows you to create a sense of space, enhance color intensity, and achieve intriguing visual effects by selectively revealing or concealing underlying layers.
3. Glazing
Apply thin, translucent layers of paint over previously dried layers to create a luminous, stained-glass effect. Glazing allows you to achieve subtle color shifts, increase the richness of hues, and add a sense of depth and luminosity to your acrylic paintings.
4. Texture Creation
Explore the tactile possibilities of acrylic painting by adding texture to your artwork. You can use various techniques such as impasto (thickly applying paint), using texture gels or modeling pastes, or incorporating materials like sand, fabric, or paper onto the canvas. Texture adds visual interest and can evoke different emotions in your acrylic paintings.
5. Styles
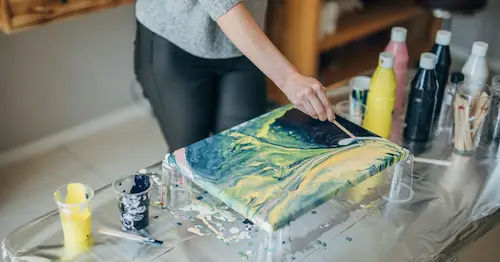
Acrylic painting offers a wide range of styles for artistic expression. Experiment with abstract painting, where you can explore free-form shapes, colors, and textures to convey emotions and ideas. Alternatively, delve into landscape painting, capturing the beauty of nature with acrylics. You can also explore portraiture, still life, or even a combination of styles to develop your unique artistic voice.
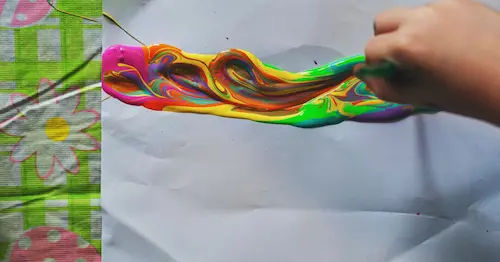
4 Easy Peasy Ways To Have Fun With Acrylic Paint
1. Shaving Cream Magic
Let’s get this started. All you need is to get a waterproof surface (you are going to dump this) and cover the whole of it in shaving cream. Yes, shaving cream, plenty of it. Then scatter around different colours of acrylic paint above the layer of whip cream. Once done, use a chopstick and mix the paint together, then press a canvas board down on the whole layer of whip cream. Next, remove the canvas board and using this canvas board, remove all the whip cream and paint using a spatula or anything really. Once the chunk of cream is removed, your job is done and your artwork is a real piece of art as unbelievable as it is.
2. Cling Wrap Unveiling
The next one is going to be as easy as the first one. Put five different colours of acrylic paint down on a canvas sheet, or any other number actually. You should attempt to drip the paint down in an artistic manner (whatever that means :)); it is important that you put different colours of paint closely to one another and leave the spaces closer to the edges untouched. By the end of this process, the paint should take up about half the surface area of the white canvas board. Once that is done, cover the whole canvas in cling wrap, yes, cling wrap. Proceed afterwards to use your hands and press above the cling wrap to spread the paint to the borders of the canvas, covering any white portions. When you are done, simply remove the cling wrap and voila, time to show off on Instagram.
3. Cardstock Swipes
It only gets easier right? Now we are going to pour acrylic paint in 1 column about a CM wide, but in many layers of different colour (try to make a pattern – Dark red, red, pink, red, dark red). It is something like pouring paint like a 15CM ruler shape, but every 2 CM mark it will be a different colour. And just grab a cardstock, and slowly wipe the paint from one edge of the canvas to the other. Do this task repetitively on around the same spot you started on. The end product will really sweep you off your feet.
4. Drippy melts
Well for this last one, there is literally no room for error. Pour dots of acrylic paint on the canvas in a random fashion. For this, it would be optimum to use three colours to best see the gradient effects. Then cut a piece of cardstock, roughly 1cm wide, and use it to wipe the paint down, 1 CM by 1 CM, Working from left to right, top to down, covering every white space on the canvas. Once you swipe all the paint onto every single portion of the canvas, you know you are done.
Acrylic Paint Grades
1. Student Quality Acrylic Paints
Student Grade acrylic paints are more cost-effective than professional grade paints since they utilize less expensive, lesser pure pigments rather than the pricey ones utilized by professionals. They also have greater quantities of additives and extenders.
2. Artist Quality Acrylic Paints
Artist grade acrylic paints contain few additives or extenders, making them more susceptible to fading. The more colors you add, the less vibrant they’ll be. Artist paints are known for emphasizing each color’s distinctiveness.
Types of Acrylic Paint
1. Heavy Body paints
The Heavy Body paints are the thickest and heaviest of the ten bodies, with a smooth texture. They’re comparable to oil paints in terms of application, and they have a mild buttery feel. They take well to hard surfaces.
2. Soft Body paints
Soft Body paints feel smoother and more yogurt-like than other kinds, making them perfect for layering with mediums while still providing enough thickness to paint freely and quickly.
3. Fluid paints
Fluid paints are smooth, creamy in texture and ideal for brushing or staining techniques. They’re excellent for glazing and detailed work since they have a pleasant flow to them when used in a bottle.
4. Acrylic Ink
Acrylic Paint is the most liquid of the acrylic paints. It’s made up of tiny, super-fine particles suspended in an unique acrylic emulsion that flows like water. When dry, Acrylic Ink has a glossy sheen and is brightly colored. It may be produced with an airbrush pen or brush to achieve it.
5. Open paints
Open Paints dry slowly, making it easy to paint wet-into-wet and blend colors on the surface of your artwork. They’re ideal for painters who want to utilize oils-only methods.
6. Interactive acrylics
Interactive Acrylics are highly versatile, one-of-a-kind acrylic that is fast-drying and artist quality. They also have an unique “unlocking formula,” a liquid that rewets dried interactive acrylic and slows drying as few drops are added to wet paint.
7. Acrylic Gouache
Acrylic gouache is a creamy paint with a velvety matte finish. With this paint, brush markings are less obvious than they are with other artists’ paints. If you want to paint an entire wall of flat color at once, consider using gouache.
8. Acrylic Markers
Acrylic markers are paint marker pens that may be utilized to mix painting and drawing styles. Acrylic markers are high-coverage, fast-drying, water-resistant, and fade resistant. Even bright surfaces will be stained with a brilliant hue or painted with acrylic markers and adhered to most materials, including metals.
9. Acrylic Spray paint
Acrylic spray paint is a flexible paint with a wide range of applications. If you use one that contains solvent, use one with a fume mask or in an adequately ventilated area. Water-based paints do not produce toxic vapors, so they are ideal for indoor usage.
Caring for Acrylic Paintings
- Protection from Sunlight: Shield your acrylic paintings from direct sunlight, as prolonged exposure can cause color fading and deterioration. Display your artwork in well-lit areas away from windows or use UV-protective glazing if framing.
- Cleaning: Regularly dust your acrylic paintings using a soft, dry cloth or a soft brush to remove surface dirt. If necessary, lightly dampen the cloth with water and gently wipe the surface. Avoid using harsh cleaning agents or excessive moisture.
- Storage: Ensure your acrylic paintings are completely dry before storing them. Place acid-free tissue paper between each painting to prevent sticking or smudging. Store them vertically or horizontally in a cool, dry area to avoid warping.
- Framing: Consider framing your acrylic paintings to provide additional protection and enhance their presentation. Choose acid-free mats, backing boards, and UV-protective glazing to safeguard your artwork from environmental factors.
- Handling and Transport: When moving or transporting acrylic paintings, ensure they are adequately protected. Cover them with a clean cloth or acid-free paper and place them in a secure, padded container to prevent damage from impacts or shifts.
Acrylic Painting: Tips To Paint Vibrantly
- Use two cups of water: Have one cup of water to wash off the paint from your brush and another cup to wet your clean brush before painting. This ensures cleaner and brighter paint colors.
- Complementary colors: Colors opposite each other on the color wheel are complementary. When used side by side, warm and cool colors create a pleasing contrast. For example, blue with orange or yellow with purple.
- Mixing complementary colors: Mixing complementary colors can result in cloudy colors instead of vibrant ones. Complementary colors combine to create a color similar to black. Avoid randomly mixing complementary colors together.
- Biased primary colors: Primary colors (red, yellow, blue) are not pure but have biases toward other colors. Determine if your primary color leans towards another color. For example, a yellow leaning towards orange is a warm yellow, while one leaning towards green is a cool yellow.
- Mixing biased primary colors: To achieve clean colors, mix primary colors that lean towards the same secondary color. For instance, a cool blue and a cool yellow, both leaning towards green, will create a nice green when mixed. Similarly, a warm blue mixed with a cool red will result in a pleasing purple.
- Avoid mixing warm and warm: Mixing warm versions of primary colors may lead to muddy colors. Warm blue and warm yellow will produce a muddy green due to the inclusion of red (warm blue and yellow contain red).
By following these tips, you can achieve clearer and more vibrant colors in your acrylic paintings, avoiding cloudiness and muddiness in your mixes.
Common Mistakes in Acrylic Painting
1. Being Afraid to Make Mistakes
We understand, our society is one that does not promote an environment where it is okay to make mistakes. But for your painting to improve and to produce quality pieces, you have got to start taking those risks. Only by daring to venture can you explore new things/ techniques and your art will improve by leaps and bound. You will know what you can or cannot do the next time or just simply the cause and effect of certain things.
2. Colour Mixing
Beginners tend to be obsessed with trying to have every single colour at their disposal. We are here to tell you that frankly, all you need is blue yellow red and white. As for the rest, you can mix the colours out, and eventually, you will grab the hang of it. Try and experiment to see what happen and you may surprise yourself with the kinds of colour you get.
3. Colour mixing part 2
Do not attempt to squirt out huge quantities of paint for mixing purposes because you may not even get the colour that you want. So just squirt a bit of both colour at a time. Also, start with the lighter colour, and then add the dark colour to it until you reach the colour you want. The reason being that it is easier to darken a colour then to brighten it, hence the order.
4. Take your brushes out of the water
Do not leave your brushes in the water, as you will easily damage the brushes by causing fraying. Simply lay them out of the water and flat, so that the water does not ever drip all over the brush, spoiling the glue of the brush. Just a simple art tip to save your brushes if you are doing it all wrong.
5. Sufficient Paint or Water on your brush
Maybe you are facing a situation where your paint is running out already and you are lazy to mix more. So you just use whatever’s left, but that causes bumpy and rough edges. Also, you will keep running out of paint to make one good stroke, as you will be forced to reload on the paint after just a small stroke. The effect created from this repeated reload may not be what’s desired.
6. Blending mistakes
Blending is a technique to soften your brush strokes, and not to mix all of the colours together. Thus, just a few strokes will be sufficient. If you over blend, it cannot be undone. The result would be that you have created mud because all the colours have mixed together or that you created a ring of paint outside the part you blend and the inside of the ring is lacking in paint. Calm down, just a few light strokes is enough.
Acrylic Painting Singapore
Acrylic painting in Singapore is a great way to express yourself artistically and create beautiful artworks. With the right materials, techniques, and guidance from local exhibitions and events, you can use acrylic paints to create stunning pieces of artwork that are sure to be admired by many.
Furthermore, it’s important to take proper care of your paintings for them to last over time; make sure they are kept away from direct sunlight as well as handled carefully during transport or storage. With these tips in mind, you’ll be ready to start exploring this wonderful world of acrylic painting!
Looking for more articles? Check out our recommendations below:
- Easy Paintings For Beginners in Singapore (2025)
- Easy Paintings To Try in Singapore (2025)
- Best Painting Workshops in Singapore (2025)
- Best Painting Studios in Singapore (2025)
- Famous Paintings in Singapore (2025)
Frequently Asked Questions (FAQ)
If you have any questions about acrylic painting in Singapore, you can refer to the frequently asked questions (FAQ) about Acrylic Painting In Singapore below:
What are the basic supplies I need to start acrylic painting?
The essential supplies for acrylic painting include acrylic paints, brushes, canvases or painting surfaces, a palette for mixing colors, and water or mediums for thinning and cleaning brushes.
How long does it take for acrylic paint to dry?
Acrylic paint typically dries within 20-30 minutes, depending on factors such as humidity, thickness of application, and the brand of paint used. Keep in mind that thicker layers or impasto techniques may require more drying time.
Can I use water to thin acrylic paint?
Yes, water can be used to thin acrylic paint. It helps create a more fluid consistency for techniques like glazing or transparent washes. However, for significant thinning or altering the paint’s properties, acrylic mediums are recommended.
How do I clean acrylic paint from brushes?
Rinse the brushes with water immediately after use, wiping off excess paint. For thorough cleaning, use mild soap or brush cleaner, gently lathering the bristles and rinsing until the water runs clear. Reshape the brushes and let them air dry.
Can I paint with acrylics on different surfaces besides canvas?
Acrylic paints can be applied to various surfaces such as canvas, wood, paper, fabric, and even glass or metal. Just ensure that the surface is properly prepared or primed to optimize paint adhesion and longevity.
Can I mix different brands of acrylic paints together?
Mixing different brands of acrylic paints is generally fine, but be aware that each brand may have variations in color pigments and consistency. It’s advisable to test the color mixture on a small surface before applying it to your artwork.
How can I prevent my acrylic paints from drying out too quickly in Singapore’s hot climate?
To slow down the drying process, use a palette with an airtight lid or mist water onto the palette and paints intermittently. Alternatively, consider using a stay-wet palette or palette paper that retains moisture.
What should I do if my acrylic painting becomes too dark or muddy?
If your painting appears dark or muddy, allow the layers to dry completely and then glaze or repaint with lighter or brighter colors. Building up layers gradually can help avoid a muddy appearance.
Can I varnish my acrylic paintings?
Yes, you can varnish your acrylic paintings to protect them and enhance their appearance. It is recommended to wait for the painting to fully cure (approximately 1-2 weeks) before applying a removable varnish specifically designed for acrylic paintings.